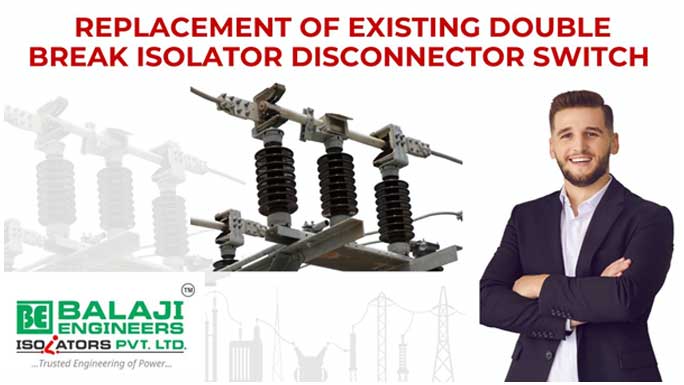
Replacement of Existing Isolator Disconnectors: A Step-by-Step Guide
Isolator disconnectors are crucial components in electrical systems, ensuring safe maintenance and repair by isolating electrical circuits from power sources. Over time, these devices may become outdated, faulty, or inefficient, requiring replacement to maintain optimal functionality and safety. In this blog, we will walk you through the step-by-step process of replacing existing isolator disconnectors, focusing on safety, efficiency, and industry best practices.
Why Replace an Isolator Disconnector?
Wear and Tear : Like all electrical equipment, isolator disconnectors degrade over time due to continuous use, exposure to environmental conditions, and aging components.
Outdated Technology : Older models may lack modern safety features or compatibility with newer systems.
Increased Efficiency : Newer models are designed to be more efficient, reducing energy losses and improving system performance.
Safety Risks : Faulty or malfunctioning disconnectors can pose a significant safety hazard to both personnel and equipment.
Alignment issue : In substations common problem about isolator is its alignment. Moving contact is not fixing in Fixed contact, or its bounce, or it got twist before it enter into fixed contact, Some time pitting or welding is major proble for alignment of Isolator.
If you’re considering replacing your isolator disconnectors, Balaji Isolators, a leading isolator manufacturer in India, offers high-quality, reliable solutions. Based in Kolhapur, Balaji Engineers Isolators Private Limited is known for manufacturing state-of-the-art isolators that meet modern safety standards and performance requirements.
Step-by-Step Guide to Replacing Isolator Disconnectors
1. Assess the Need for Replacement
The first step in the replacement process is determining whether your isolator disconnector needs replacing. Look for the following signs:
- Inconsistent operation or failure to open/close correctly.
- Visible signs of wear such as corrosion, discoloration, or damage.
- Higher-than-normal temperature readings, indicating overheating.
- Frequent tripping or failures in the system it controls.
- Operator facing challenges to operate handle of Isolator to ON or OFF
- Moving contact blocked and not moving for its operation
- Mechanical as well as Motor type operation systems are facing problems .
- Fixed contact jows or Moving contact heating too much .
- Fire spot observed in male and female contact.
- Isolator structure and accessories got rusted and in dangerous position
- Earth blade is not working properly .
A thorough inspection, carried out by a qualified technician or engineer, will help confirm the need for replacement.
2. Choose the Right Replacement Disconnector
Once you’ve identified the need for replacement, it’s essential to select the correct isolator disconnector. Consider the following factors:
Voltage Rating: Ensure the replacement disconnector matches or exceeds the voltage of the current system.
Current Rating : The disconnector should handle the required current load safely.
Compatibility : The replacement unit must be compatible with the existing system design and installation points.
Safety Features : Look for modern disconnectors with improved safety mechanisms, such as arc flash protection or remote operation capabilities.
If you’re looking for high-quality replacement units, Balaji Isolators offers a wide range of isolators designed for optimal performance, durability, and safety.
3. Plan the Replacement Process
The replacement process must be carefully planned to avoid unnecessary downtime or safety risks. Here’s how:
Schedule Downtime :Plan for system downtime during the replacement. Communicate the schedule to all stakeholders to minimize disruption.
Prepare Tools and Equipment : Gather the necessary tools, including insulated wrenches, gloves, and any protective equipment required
Isolate the System :Before starting, ensure the entire system is de-energized and isolated from all power sources. Test to confirm no live current is present.
Safety First : Always adhere to your organization’s safety procedures and industry regulations when working with electrical equipment.
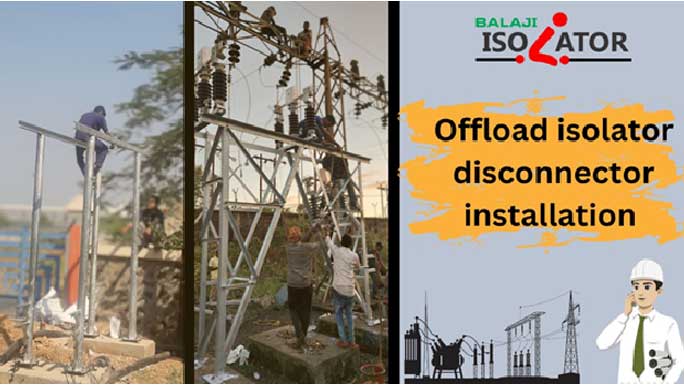
4. Disconnect the Existing Isolator
Follow these steps to safely remove the existing isolator disconnector:
Disconnect Power : Ensure the circuit is de-energized and lock out/tag out procedures are followed.
Remove Cables : Carefully disconnect the cables and wires from the old isolator. Label the wires if necessary to ensure correct reinstallation.
Unbolt the Unit : Loosen the bolts securing the isolator to its mounting point. Gently remove the old unit, taking care to avoid damaging any adjacent components.
5. Install the New Isolator Disconnector
With the old unit removed, it’s time to install the replacement:
Position the New Unit: Mount the new isolator in the same position as the old one, ensuring it’s securely fastened.
Reconnect Cables : Attach the wires and cables to the corresponding terminals, checking the manufacturer’s instructions to ensure a proper connection.
Tighten Bolts and Connections : Make sure all electrical and mechanical connections are securely tightened to avoid future issues.
6. Perform Testing and Commissioning
Once the new isolator is installed, testing and commissioning are crucial to verify its functionality:
Conduct Safety Tests :Test for electrical continuity and insulation resistance to ensure the new disconnector is correctly installed and safe to use.
Test Operation : Energize the system and operate the isolator disconnector, checking for smooth functionality. Verify that it isolates the circuit as expected.
Monitor Performance : After installation, monitor the disconnector’s performance over the next few days or weeks to ensure everything operates as intended.
7. Document the Process
Once the replacement is complete, update your system documentation to reflect the new installation. This includes noting:
The date of replacement.
The make and model of the new disconnector.
Any test results or performance data.
Proper documentation ensures you have a clear record for future maintenance, troubleshooting, or system upgrades.
Frequently asked questions
1.Existing इसोलेटर डिसकनेक्टर को बदलने की ज़रूरत क्यों?
बदलाव की प्रक्रिया में जाने से पहले, यह समझना महत्वपूर्ण है कि इसोलेटर डिसकनेक्टर को बदलने के प्रमुख कारण क्या हैं:
1. घिसावट और टूट-फूट: अन्य सभी विद्युत उपकरणों की तरह, इसोलेटर डिसकनेक्टर भी समय के साथ निरंतर उपयोग, पर्यावरणीय परिस्थितियों और पुराने घटकों के कारण खराब होते हैं।
2. पुरानी तकनीक: पुराने मॉडल में आधुनिक सुरक्षा सुविधाएं या नए सिस्टम के साथ संगतता की कमी हो सकती है।
3. बढ़ी हुई दक्षता: नए मॉडल अधिक कुशल होते हैं, जिससे ऊर्जा की हानि कम होती है और सिस्टम का प्रदर्शन बेहतर होता है।
4. सुरक्षा जोखिम: ख़राब या दोषपूर्ण डिसकनेक्टर से कर्मियों और उपकरणों दोनों के लिए गंभीर सुरक्षा खतरा हो सकता है।
2. What is a common alignment issue in substations related to isolators?
A common alignment issue with isolators in substations is that the moving contact often doesn’t properly align or fix with the fixed contact. This misalignment can lead to several problems, such as:
1. Contact Bouncing: The moving contact bounces instead of securing firmly in the fixed contact.
2. Twisting: The moving contact may twist before entering the fixed contact, causing improper engagement.
3. Pitting or Welding: Sometimes, pitting or welding occurs, which can worsen the alignment problems, leading to inefficient operation or failure of the isolator.
3. How to assess the need for replacement of an isolator disconnector?
आइसोलेटर डिस्कनेक्टर को बदलने की आवश्यकता का आकलन करने के लिए निम्नलिखित संकेतों पर ध्यान दें:
Inconsistent operation या सही तरीके से open/close नहीं हो रहा है।
Visible signs of wear जैसे corrosion, discoloration, या physical damage।
Higher-than-normal temperature readings, जो overheating को दर्शाते हैं।
उस system में frequent tripping या failures जिसे यह control करता है।
इन संकेतों को पहचानने के बाद, एक qualified technician या engineer द्वारा thorough inspection करवाना चाहिए ताकि replacement की आवश्यकता की पुष्टि हो सके।
4.पुराना Isolator Disconnect करें and install new Isolator ?
Disconnect Power (बिजली काटें): सबसे पहले यह सुनिश्चित करें कि circuit de-energized हो चुका है, और lockout/tagout procedures को follow किया गया हो। Safety के लिए ये सबसे critical step है।
Remove Cables (तारों को हटाएं): सभी cables और wires को ध्यान से disconnect करें। अगर जरूरी हो तो उनको label कर लें ताकि बाद में reinstallation में आसानी हो।
Unbolt the Unit (बोल्ट खोलें): जो bolts isolator को पकड़कर रखे हुए हैं, उन्हें धीरे-धीरे खोलें। ध्यान रहे कि आस-पास के components को नुकसान न हो।
नया Isolator Install करें
पुराने unit हटाने के बाद, नए isolator को install करने के लिए:
Reconnect Cables (तारों को फिर से जोड़ें): सभी wires और cables को सही terminals पर जोड़ें, और manufacturer’s instructions को follow करें ताकि connections सही हों।
Tighten Bolts and Connections (बोल्ट और कनेक्शन करें): सभी electrical और mechanical connections को अच्छे से टाइट करें ताकि future में कोई problem न हो।
5. Isolator Installation के बाद Testing और Commissioning कैसे करें
Safety Tests (सुरक्षा परीक्षण करें):
Electrical Continuity Test (विद्युत प्रवाह की जांच करें): यह सुनिश्चित करें कि isolator के सभी electrical connections सही ढंग से जुड़े हुए हैं। Continuity test से यह verify होता है कि current पूरे system में सही से flow हो रहा है।
Insulation Resistance Test (इन्सुलेशन रेजिस्टेंस की जांच करें): Isolator के इन्सुलेशन की जांच करें ताकि यह पक्का हो कि कोई leakage current नहीं हो रहा। यह test यह सुनिश्चित करता है कि isolator सुरक्षित है और installation ठीक हुआ है।
नया Isolator Install करें
Test Operation (इन्सुलेटर के संचालन की जांच करें):
System Energize करें (सिस्टम को चालू करें): Isolator को energize करें और इसे manually operate करें। ध्यान दें कि isolator smoothly काम कर रहा है और कोई abnormal sound या malfunctioning तो नहीं हो रही।
Circuit Isolation (सर्किट को isolate करें): Confirm करें कि isolator सही से circuit को isolate कर रहा है। इसका मतलब है कि isolator जब off किया जाता है तो circuit में कोई current flow नहीं हो रहा होना चाहिए।
Monitor Performance (प्रदर्शन की निगरानी करें):
Performance Observe करें (प्रदर्शन पर नजर रखें): Installation के बाद, isolator के performance को कुछ दिनों या हफ्तों तक monitor करें। देखिए कि सभी operations normal तरीके से हो रहे हैं या नहीं। अगर कोई problem आती है, तो उसे तुरंत troubleshoot करें।
Conclusion
Replacing an existing isolator disconnector is a critical task that requires careful planning and execution to ensure the ongoing safety and reliability of your electrical system. By following the steps outlined in this guide, you can efficiently replace an outdated or faulty disconnector, minimizing downtime and reducing the risk of future issues. Always remember to prioritize safety at every step, and consult with qualified professionals when necessary to ensure the job is done correctly.
By maintaining up-to-date equipment, you enhance the overall performance, safety, and longevity of your electrical system. For the best replacement options, consider Balaji Isolators, a trusted name in the industry, for their top-notch solutions.
Need help choosing the right replacement isolator disconnector? Contact Balaji Engineers Isolators Private Limited, Kolhapur for personalized guidance and expert support in finding the perfect solution for your needs!
Find Isolator Disconnetor near me
Andhra Pradesh, Amaravati, Visakhapatnam, Vijayawada, Arunachal Pradesh, Itanagar, Naharlagun, Assam, Dispur, Guwahati, Tinsukia, Bihar, Patna, Muzaffarpur, Barauni, Chhattisgarh, Raipur, Bhilai, Korba, Goa, Panaji, Vasco da Gama, Gujarat, Gandhinagar, Ahmedabad, Surat, Vadodara, Haryana, Chandigarh, Gurugram, Faridabad, Panipat, Himachal Pradesh, Shimla, Baddi, Jharkhand, Ranchi, Jamshedpur, Bokaro, Karnataka, Bengaluru, Mysuru, Mangaluru, Kerala, Thiruvananthapuram, Kochi, Kozhikode, Madhya Pradesh, Bhopal, Indore, Jabalpur, Maharashtra, Mumbai, Pune, Nagpur, Nashik, Manipur, Imphal, Thoubal, Meghalaya, Shillong, Byrnihat, Mizoram, Aizawl, Lunglei, Nagaland, Kohima, Dimapur, Odisha, Bhubaneswar, Rourkela, Cuttack, Punjab, Chandigarh, Ludhiana, Amritsar, Rajasthan, Jaipur, Jodhpur, Kota, Sikkim, Gangtok, Rangpo, Tamil Nadu, Chennai, Coimbatore, Tiruppur, Telangana, Hyderabad, Warangal, Nizamabad, Tripura, Agartala, Udaipur, Uttar Pradesh, Lucknow, Kanpur, Noida, Varanasi, Uttarakhand, Dehradun, Haridwar, West Bengal, Kolkata, Durgapur, Howrah.